Wednesday, 18 July 2012

Home-made Puff Pastry


First thing you need, essential for making puff pastry is a feature length DVD movie.  |The process of making the pastry from scratch will take about 2.5 hours with 5 minutes of work to do every 30 minutes, so i hit the pause button, get up do the work and then go back to the movie.

Ingredients
-  3 cups flour
-  1 teaspoon of salt
-  150g unsalted butter (cold, cut in cubes of 1 cubic cm)
-  1/2 cup cold water
-  one 250g unsalted butter softened

Combine the flour and salt in a mixing bowl and cut in the cold butter cubes using 2 knives until it forms coarse sized grains.  Tip onto a floured surface, making a well in the middle, add a little water and using a fork combine flour and water to form a dough.  We are try to making the dough firm without having to use too much water.  Once the flour combines use your hands and knead the dough until it becomes a bit elastic.  Then wrap in Glad wrap and let it rest in the fridge for 30 minutes.


Butter rolled out and covered

Place the 250g stick of butter between 2 pieces of wax baking paper and using a rolling pin roll the butter out into a rectangular sheet, 8" x 6", wrap in plastic and place in the fridge.

After 30 minutes take both the dough and the butter out of the fridge.  Knead the dough a few times and then roll it out to a rectangle 12" x 10".  Lay the butter in the centre of the rectangle of dough and then fold the dough like closing a book or an envelope.  Wrap in plastic and refrigerate for 30 minutes.

Laying the butter on the rolled dough


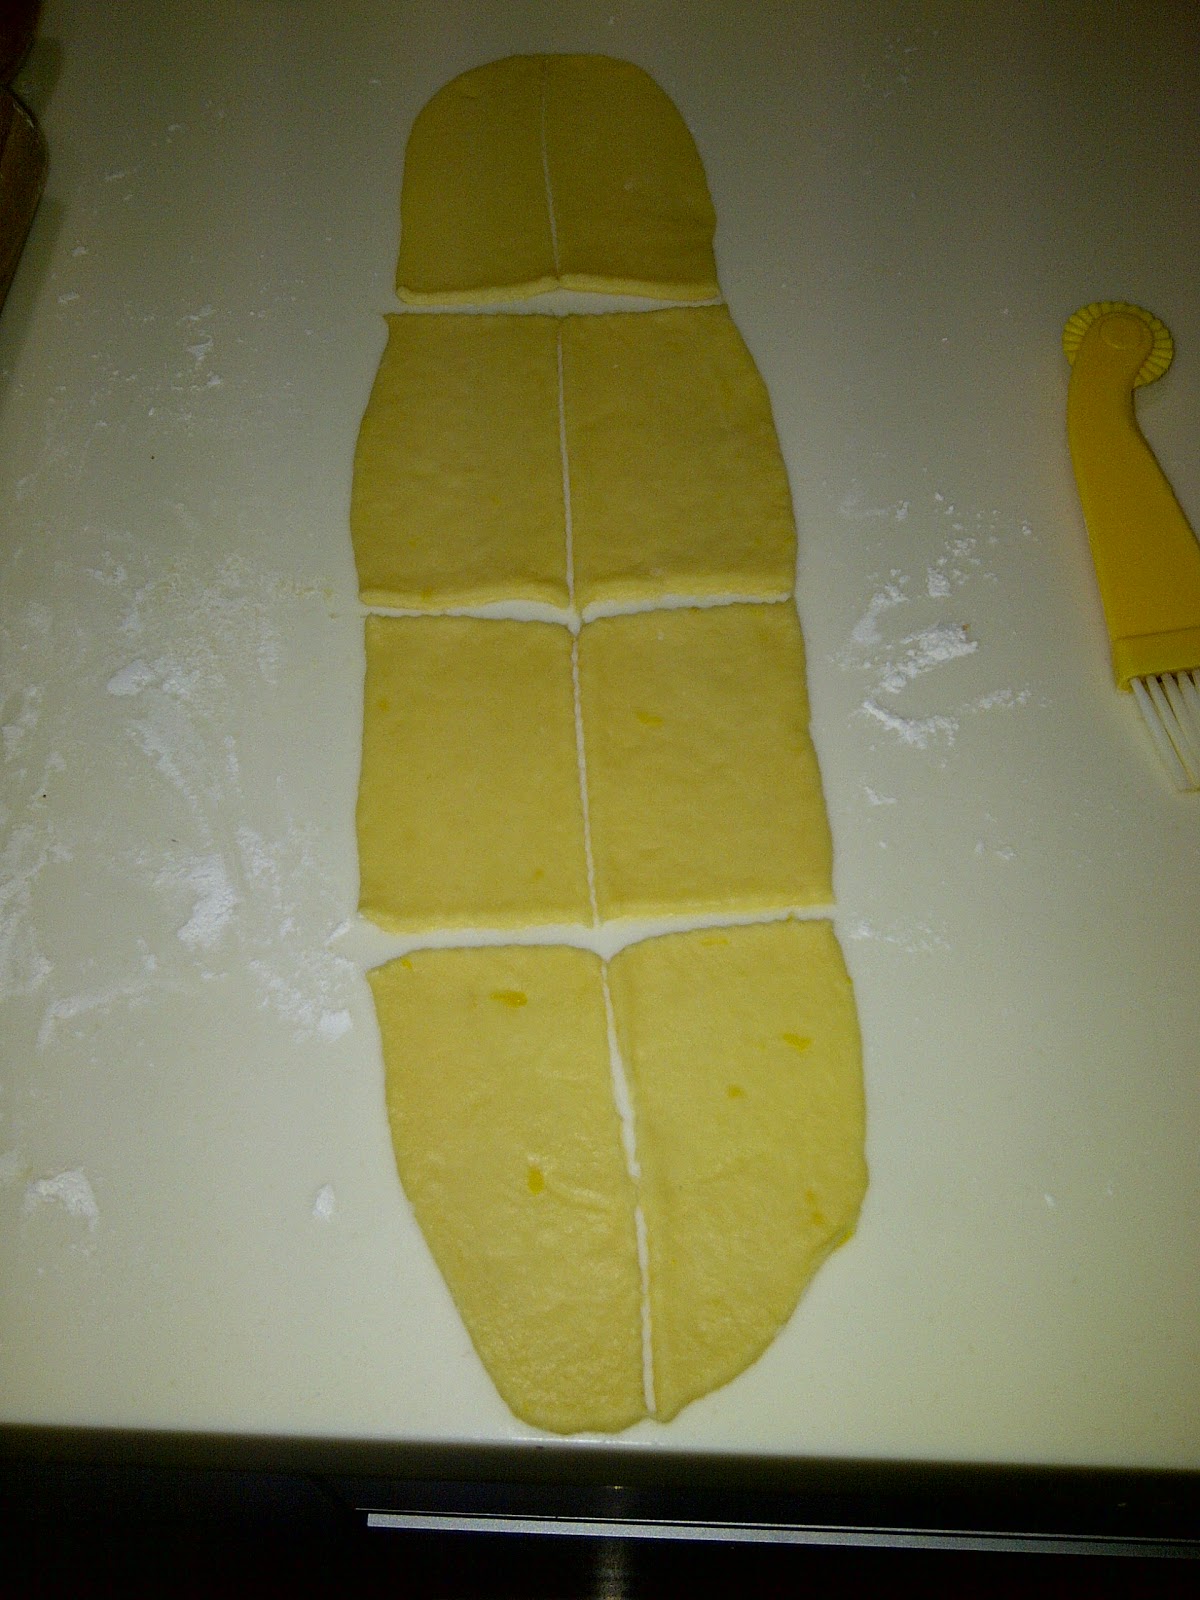
The process of folding and roling 5 times

The key to a good puff pastry is this rolling, folding and resting sequence which you need to repeat 4 more times, hence the feature length DVD requirement.  It will only take a few minutes each time to do the rolling and folding. 

At the end you should have enough puff pastry to cut and form 3 sheets that would fit a 9" pie dish.  One sheet should be enough to wrap your beef wellington.  use 2 sheets for a meat pie.

A slice through the end product
 The pic on the right shows a cross-section through the puff pastry.  Look at all the gorgeous layering that we've achieved through the folding and rolling process.  The hot oven will generate steam that will work its way through the layers giving us the puffed pastry we want.

Enjoy!

Tuesday, 17 July 2012

Crostoli

My memory of my aunty's crostoli is a delightful, light crumbly sweet that has you taking one piece after another.  It's generally reserved for a big occasion - giving the impression that it is difficult to prepare (or to get right).

Well tonite I tried to give it a go, did a bit of research and then adapted the following recipe :

Ingredients

Ingredients

- 2 tablespoons of butter
- 3 tablespoons of caster sugar
- 2 cups of flour
- 1 teaspoon of baking powder
- 1/2 teaspoon of salt
- 2 eggs
- half a lemon zested and juiced
- 2 tablespoons of dark rum (I used Bundaberg Rum)

- enough oil to have 4 or 5cm deep in a small saucepan. 
- icing sugar to dust the crostoli

Directions

Sweet dough
Beat the butter and sugar together.  Add the eggs, lemon zest and juice, the rum and beat together.  Separately combine the dry ingredients of flour, baking powder and salt and then gradually add to the liquid mixture combining the wet and dry ingredients to form what is essentially a sweet pasta dough.  It should not be sticky - if it is, add a little flour.  Turn the dough out onto a floured surface, knead for a few minutes and then wrap in Glad wrap and leave rest for 30 minutes on the bench. 


Rolling with rolling pin
Cut the dough into quarters.  Working with one quarter at a time roll into a long thin strip.  I don't have a pasta machine and always use a rolling pin - it works fin.  Cut into 10cm pieces and if desired, make a slit in the middle, fold half the dough through to form a bow-tie.  I work in quarters, cut, shape and cook then move to the next quarter.


Heat the oil, testing with a small amount of pastry to see if it sizzles and bubbles surround the pastry upon entry into the oil.  Careful not to have the oil too hot otherwise the outside will char before the pastry is cooked through.

I add the un-cooked crostoli pieces  one at a time to the hot oil.  Swirling with a fork and turning after 15 seconds i let the crostoli reside in the oil only 30 seconds before removing with a slotted spoon.  I experimented with a little longer time and noticed it was a fine line between golden crostoli and burnt ones.

Once removed from the oil place on paper towels to absorb extra oil and allow to cool. 

Dust with icing sugar and serve with a cup of coffee.  Can keep in a air-tight container for several weeks but they won't last that long.


Enjoy!

Crazy 8's


You've probably heard of the card game Crazy 8's and you may be wondering how Crazy 8's could refer to food.

Well it has everything to do with food - Crazy 8's is Exercise!!! 

The food in Malaysia is so good and I like eating it as well as cooking my own so to cancel out some of the calories, and let's be honest, we have a high calorie diet, i have to do plenty of exercise.

So today i'm sharing with you an exercise routine that i learnt about a year ago that will get you well on the way to burning calories and earning you that little slice of cheesecake.

You can do it at the gym or in your living room in front of the TV and it will only take 35 minutes.  It will exhaust you a bit - and that is the idea as we are trying to strengthen muscles and increase metabolism in the one routine.

Grab a pair of light dumbells, 2-5lb for ladies, 12-25lb for guys.  If you don't have dumbells just use your hands clenched in fists, and do the following :

8 x bicep curls
8 x shoulder press
8 x upright rows
8 x bent over double arm rows
8 x bent over single arm rows with one hand at a time
8 x push-ups (3 counts down, 1 count up)
8 x lateral side raises
8 x dumbell shrugs
8 x stiff legged dead lifts
Rest for 1 minute

Repeat this routine 8 times and very, very important that you adhere to the 1 minute break.  Breaking longer will result in too much drop in your heart-rate and loss of a lot of the benefit you are seeking.

Do this workout 2 or 3 times a week and start to reap the rewards.

Enjoy!

Monday, 16 July 2012

Crispy Salted Egg Prawns

 This is one of my favorite dishes in Malaysia.  A chinese dish that is so awesome in taste that will leave you wanting more, but beware, cholestoral in this one is high so please indulge occasionally only!!

Ingredients

- 300g of peeled prawns (about 30 small prawns)
- 2 quarts of Cooking oil. (Preferably a vegetable oil)
- 3 duck eggs
- 2 eggs
- 1 cup of all-purpose flour
- 2 cloves of garlic
- 1 teaspoon of crushed red chili in white wine vinegar
- Soya Sauce
- Lettuce for garnishing

Directions

In a small saucepan boil the duck eggs in water till hard boiled (5-7 minutes in boiled water to be sure). 

While the eggs are cooking de-vein the prawns by sliding a sharp knife down the back of the prawn and removing the vein.  Have a bowl of water handy to rinse the prawns and then pad them dry before putting one by one in the egg and cover with flour.  Place the coated eggs on a plate and put in the fridge for 15-20 minutes to seal.

Gotta love deep-fried
Place the oil in a medium-sized heavy based saucepan.  The Chinese would use a flame and a wok, but my little kitchen has an electric stove so have to make do with the saucepan, but don't worry it works fine.  Put on high heat.

While the oil is coming to cooking temperature peel the duck eggs.  Discard the whites (i know this is a bit of a waste.  Alternatively you could keep the whites for a rice porridge, but it's not something i eat.  The whites are extremely salty and not really my taste).  For this dish we want the red/golden yolk of the eggs.  put in a plate and mash with a fork.

A slotted spoon is a must
Chop the garlic into little pieces and place a piece in the oil to test the temperature.  If it sizzles and bubbles form then you are ready to deep-fry the prawns.  Get them from the fridge and add 5 at a time to the oil.  We don't want to add to many at once as the temperature of the oil will drop and they won't deep fry.  Leave the prawns for 60-90 seconds and then extract with a slotted spoon to a dish. 


Combining egg yold with prawns

Add more of the garlic and the crushed chili to the oil to add more flavour.  The oil will sizzle when the whilte wine vinegar hits the oil, so just a little safety queue there to be careful.  Continue the process of deep-frying till all 30 prawns are done then remove the oil from the heat.

On the same hotplate use a skillet to combine the eggyolk and the prawns.  When the skillet is hot add a tablespoon or 2 of the hot oil, a little soy sauce if desired, 1/5 of the duck egg and 6 of the prawns.  Stir the contents around with a spatula combining the egg yolk with the prawns.  This only takes a few seconds.  Transfer to a serving plate decorated with lettuce leaves.  Repeat for the remainder of the prawns and egg yolk.  Sprinkle with more salt and pepper if desired.

Your ready to serve this up with steamed rice and a meat dish.  Please remember to do some treadmill before this meal  and the next day to burn off the cholestoral!!

A variation that I want to try is to use 2 tablespoons of salted butter in the skillet for combining the egg yolks to the prawns.  We will call that butter fried prawns and will give a bit softer creamier texture to the prawns and taste great.

Enjoy!


Blueberry Cheesecake


This cheesecake is one of my favorites so far.  Made it during my parents' last visit to KL.  Blueberries are expensive here, and probably everywhere, so I used a mixture of one punnet of fresh blueberries for the filling and one can of canned blueberries for the topping.

Ingredients

For the crust

- 1 1/2 packet of Arnotts Malt-o-Milk biscuits http://www.arnotts.com/our-products/products/plains.aspx
- 1/3 cup of granulated sugar
- 3/4 of a 250g stick of butter (melted)

For the filling

- 2 x 250 packets of Cream Cheese
- 3 eggs
- 1 can of Nestle Sweetened Condensed Milk
- 1 punnet of fresh blueberries
- 1/2 teaspoon vanilla


For the topping

- 1 can of blueberries
- 1/4 cup of sugar
- 1/2 cup water
- 1 tablespoon of corn starch

Directions

Put the Milk Arrowroot biscuits in a sealable food storage bag.  Using a rolling pin, gently crush the biscuits.  In a medium mixing bowl combined the the biscuits crumbs, melted butter and sugar and combine with your fingers.  the Malt-o-milk bisuits are less sweet than the Milk Arrowroot so I add sugar to the base for this one.
Transfer the combined crust mixture to a greased 9" pie dish.  I like using this pie dish for cheesecake as it allow for a lot more of the delicious crust. Press the crumbs firmly into the dish and then bake at 150C for 10 minutes - take out of the oven and allow to cool.

In  a large mixing bowl and using hand beaters, beat the cream cheese and condensed milk until the lumps are taken out.  Add one egg at a time and the vanilla essence and continue to beat.  Puree the fresh blueberries and add to the mix.  This will give the cheesecake a beautiful blue tinge and flavour.  Avoid overbaking the mixture.

Pour the filling into the pie dish and place in a baking tray filled to half the height of the dish with water.  This will keep the oven moist when it bakes and prevent your cheesecake from becoming dry.

Bake at 150C for 45 minutes checking occasionally for doneness.  The middle of the cake should still wobble a bit when it is done.  Once cooked leave the door of the oven ajar and let the cheescake cool competely in the oven before removing from the oven.  Then allow the cheesecake to refrigerate for 6-8 hours, preferably overnight.
For the topping, combine the water, cornstarch and sugar in a small saucepan on a low heat dissolving the solids.  Add the contents of the canned blueberries and simmer until the sauce reduces and thickens up.   Allow to cool in the fridge or pour directly on the cheesecake.
Run a sharp knife under hot water and use it to cut the cheesecake into the desired sizes.  The blueberry topping will spill over the edge of the slice looking absolutely gorgeous, perfect as a break to a game of mahjong.
Enjoy!

Sunday, 15 July 2012

Tiramisu (Marsala Pudding)


We grew up calling this one "Saviardi pudding" or "Marsala pudding", which was testament to the prime ingredients used in this variation of Tiramisu.  It is my favorite dessert dish of all time and definitely the easiest to prepare and to obtain satisfaction from your friends.

Ingredients

- 1 large packet of Saviardi biscuits (enough to make 2 layers of your dish)
- 2 cups of Marsala liqueur http://vok.com.au/boronia.html
- 125g butter
- 1/3 cup of sugar
- 4 egg yolks
- 3 heaped teaspoons of coffee
- 3 teaspoons of sugar

For the topping
- 1 cup of whipping cream
- chocolate to grate on top (optional)

Directions


In the baking dish of your choice lay the biscuits flat in a layer (orientation doesn't matter just so the surface area is covered).  With one finger in the end of the Marsala bottle, sprinkle a fair amount of Marsala, maybe a cup evenly over the biscuits.  Repeat for another layer.


Biscuits with the butter mixture

In a large mixing bowl cream the butter and the 1/3 cup sugar and then add one egg at a time beating constantly on low-medium speed.  Combine the coffee and 3 teaspoons of sugar with a cup of water and then heat in the microwave till hot and all coffee and sugar is dissolved.  Pour this into the butter mixture and combine the liquid contents.  Pour the contents over the biscuits like the pic on the right.

Cover the dish with Glad Cling Wrap and place in the fridge overnight.

The next day prior to serving whip the cream and layer on top of the biscuits (which have now soaked all the butter mixture and liqueur).

Top with grated chocolate if desired. 


Final tiramisu
One yardstick of whether there is enough liqueur added is that you should see the liquid in the bottom of the dish after removing a slice of tiramisu, moreso than the on the left here.


This one will definitely have you tempted for a second helping.

Enjoy!


Almond and Choc Chip Cookies

I was thinking about what to do with the 500g sliced almonds that I had at home and I kind of felt like baking cookies.  So I found a recipe that combined almonds and chocolate chips.  Preparation time is short, difficulty is low and taste is immense! 

Ingredients

- 2/3 of a 250g stick of butter (cold)
- 1/2 cup of brown sugar
- 1/3 cup of white granulated sugar
- 1 cup of all purpose flour
- 1 egg
- 1 teaspoon baking soda
- 1 teaspoon of vanilla
- 1/2 teaspoon salt (if using salted butter then just add a pinch of salt here)
- 1 cup of sliced almonds (roasted).
- 1 cup of chocolate chips

Directions

Pre-heat the over to 180C.  If your almonds are raw then toast these first.  Do that by laying them out onto a baking sheet in the oven for 5-7 minutes at 150C.  The nuts will give off an aroma when they are toasted.  Careful not over-cooked or char the almonds.

Adding Choc chips and almonds

Cream the butter and sugars at medium speed with electric beaters.  Separately combine dry ingredients of flour, baking soda and salt.

Add the egg and vanilla to the butter mixture and beat in.  Gradually add the dry ingredients to form the cookie dough.  Avoid over-beating of the flour to reduce the air in the dough.

On a grease baking sheet put balls of dough 1.5" inches diameter, 2" apart.  Allow plenty of room as the cookies will flatten and spread as they cook.  I split the batch into a few rounds and experiment with different cooking times and heats.  (I'm told baking cookies is a lot of trial and error.  So make it a science and run some tests).

A dozen crunchy cookies
The best result i had was baked at 180C for 12 minutes, then removing the tray from the oven and allowing to cool on top of the oven for a while before transferring to a wire rack until completely cooled. 


With a soft chewiness
Quantity makes a dozen cookies about 3" in diameter.  They are crunchy on the outside and also soft and chewy.  The perfect accompaniment to an episode of Sherlock Holmes on DVD.

Enjoy!